Partition For Mac And Windows
Partitioning your hard drive can be a frustrating and daunting task. However, once you understand how the process works, it’s a lot less scary. So why would you want to partition a drive? Back when I was in college, like many other students, I had a MacBook Pro for ease of use and its minimalist aesthetic. I didn’t think about the fact that some applications that I needed for school were not compatible on Mac. That is when I thought about partitioning my drive so that I could run Windows on Mac.
In addition, I had an external hard drive that I also wanted to be able to use with both OS X and Windows. In this article, I’ll walk you through the steps for partitioning internal and external hard drives on a Mac.
 Thisfree database software for Macis undoubtedly the universal management software, for it, unlike other vendors, offers an environment that has built-in capabilities of connection to most major database environments including PostgreSQL, Firebird, Informix, HSQLDB, Openbase, etc. In this article, I'll provide a brief overview of some of the best free database software tools for Macs. What Is Database Software? Simply put, database software allows you to store, maintain, and retrieve information.
No matter which software you use, changing partition table to add new partition will result Windows fail to start. Uh, Camptune X is a good utility to adjust BootCamp and Mac partition sizes. It does not allow you to create new partitions however. It just helps you to resize two partitions if you want to change partition size later on. Oct 16, 2018 - Boot Camp helps you install Microsoft Windows on your Mac. Enough free disk space to create a Boot Camp disk partition* with a minimum.
Before you start, you should make sure to backup your entire Mac computer using Time Machine. Even if you don’t mess anything up, the chances are good that the OS will screw up and break your system.
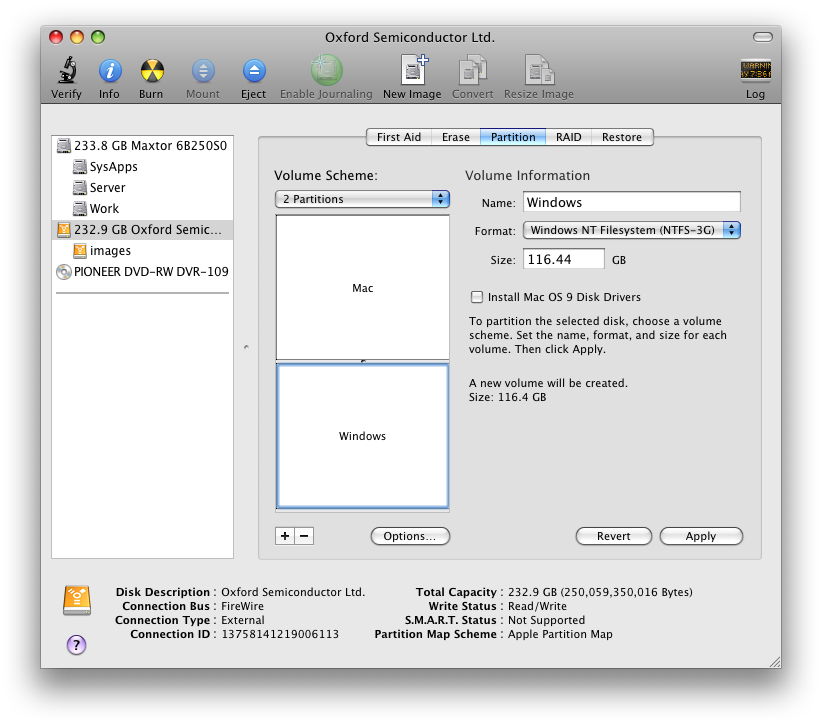
Partition External Drive If you have a large external hard drive, you can easily partition it so that the entire drive gets utilized. I was using a 1.5 TB external drive with my Mac, but never really used more than 1/4 of the space. Instead, here’s how I ended up partitioning my drive, which ended up making it much more useful: • 33%: Mac (Extra Storage) – 500GB • 33%: Mac (Time Machine Backup) – 500GB • 33%: Windows (Extra Storage and Backup can go on same partition) – 500GB As you can see, each partition can have its own file format. If you have an even larger drive, you can create even more partitions for other operating systems like Linux, etc.

To partition the drive, go to Spotlight at the top of your MacBook Screen (Notification Bar) and type in Disk Utility. On the left hand side, navigate to the tab that says EXTERNAL.
Yours will look a little bit different than mine. Under the External heading on the left hand side, you should have one hard drive instead of 3 (I have already partitioned mine). Navigate to that external hard drive and partition it according to your needs. NOTE: If your external hard drive is not formatted for the Mac operating system, you may first need to Initialize it and then Erase it.
It’s very easy: • Under the external tab on the left side, select the drive you want to use. • Then select the Erase option at the top • Once there, give it a name and format it to Mac OS Extended (Journaled) • For the Scheme, you can pick from GUID, MBR or Apple. If you’re only using the drive for storage, then it doesn’t really matter which one you pick. However, if you plan to boot from the drive, you should pick MBR for Windows and Linux and GUID for OS X. If you plan to use the drive for Boot Camp, you should also pick GUID. Note that you can also click on Security Options and choose from different levels of security.